[vc_single_image image=”1886″ img_size=”full” alignment=”center” onclick=”img_link_large” css=”.vc_custom_1459967715681{padding-bottom: 20px !important;}”]
Milk Bath Shoot – Behind the Scenes
Half submerging a model in a bath tub of milk and flowers (usually rose petals) isn’t a particularly original idea. It’s been done many times before. However, it’s surely got to be a lot of fun, and so, in the spirit of ‘try anything once’ and the pursuit of something slightly more unusual than the images I normally create, here is the story and a few behind the scene pics of my own aquatic adventure…
I guess the first thing to mention is the milk. It isn’t. Well, not out of a milk bottle at least. After doing a bit of research on the internet, my recipe for the shoot was 1 x 500g packet of ‘value’ Dried Skimmed Milk and 2 x heaped tablespoons of Cornflour, which seems to be good for half a standard sized bath of water. I used the cornflour having read somewhere that it gives the milk a ‘whiter’ appearance, however, I couldn’t immediately see any difference and you could almost certainly manage without. One thing I did learn through experimentation is that it’s best to dissolve the powder in a bucket of lukewarm water first before very gently introducing the milk mix to the bathwater. Two reasons for this.. firstly, it’s much easier to eliminate any stubborn lumpy clumps of powder in the confined space of a bucket than chase them around the comparatively oceanic depths of a bath tub. Secondly, if mixed vigorously in the bath tub, the milk tends to form thousands of microscopic bubbles that float on the surface forming a kind of scum and rather spoiling the perfect white marble effect. First time I did this, I thought I’d ruined it, but after a few minutes, the bubbles seemed to dissipate and I was left with a uniform surface. Half a kilo of value milk powder dissolved in a bucket of hot water doesn’t smell that great either and was making me feel a bit icky as I was mixing it. It did’t seem to bad once it was all mixed in, but the bathroom definitely smelt a bit yoghurty for a while after we’d finished. At least I didn’t have to get in it! 🙂
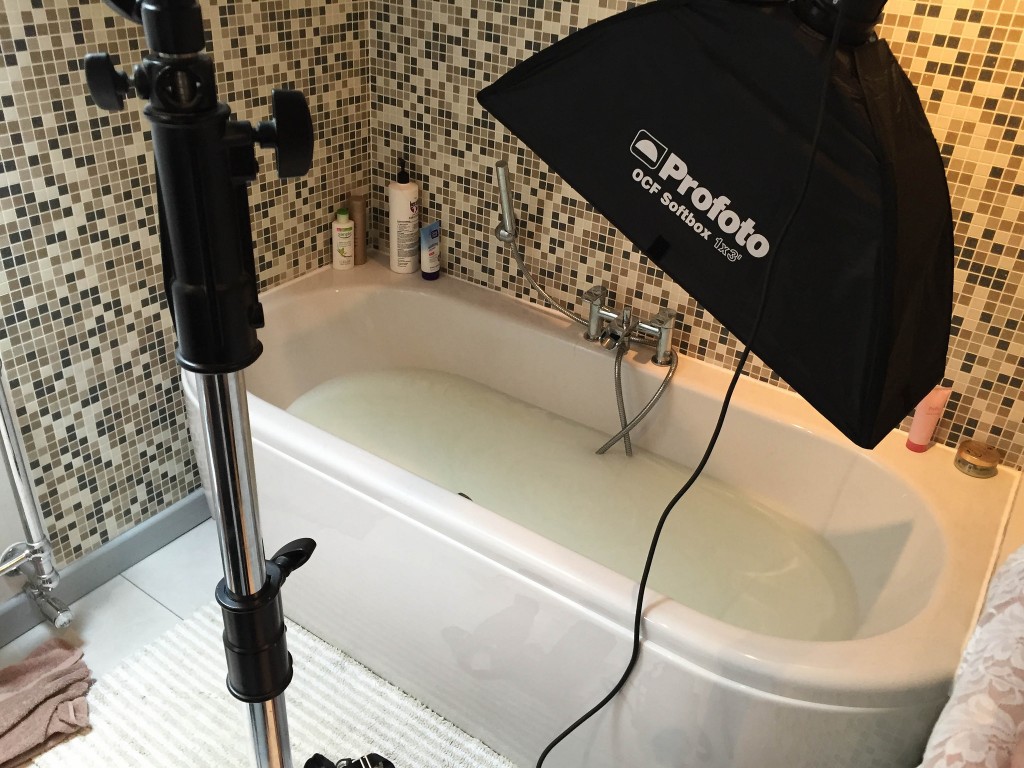
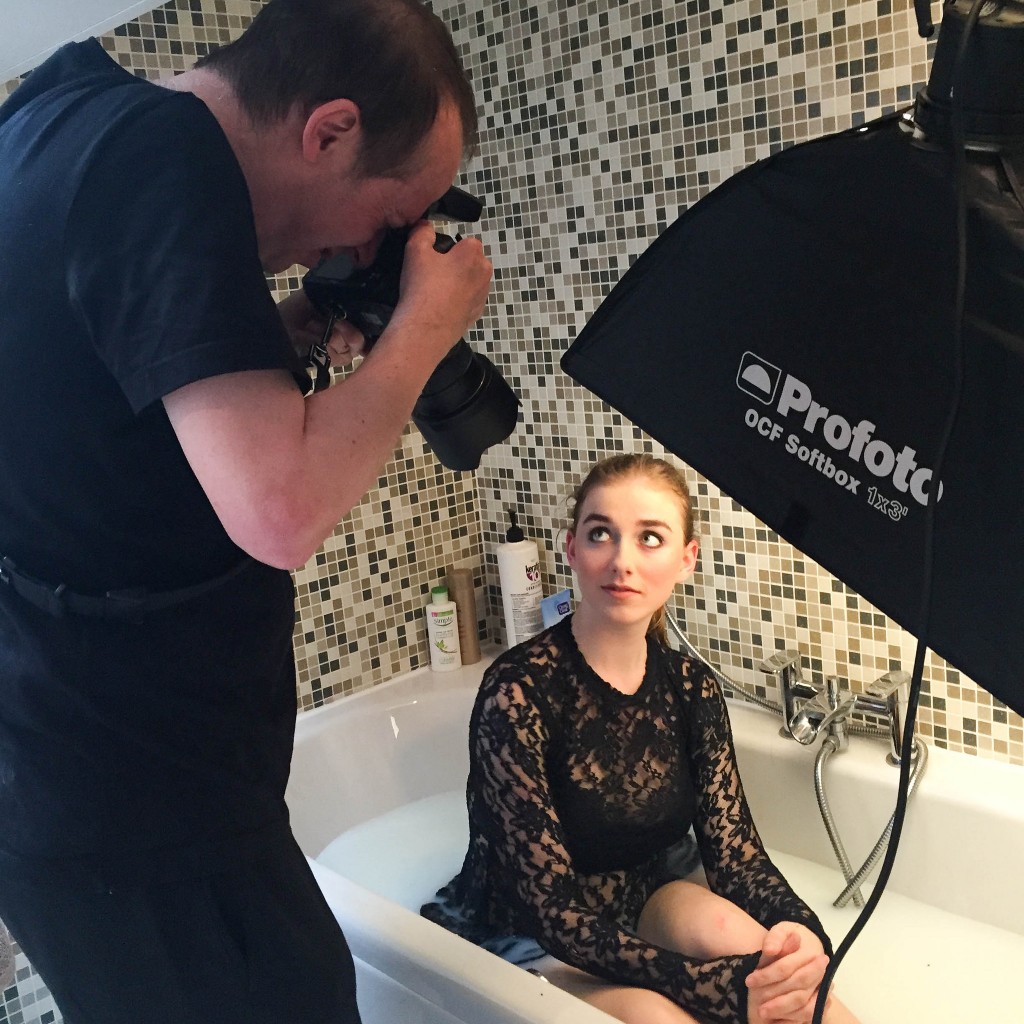
The second most important consideration for me was how to light the scene. Sadly, I don’t have a photography studio with a bath tub, so the shoot was going to have to be done in an everyday domestic bathroom and setting up some lighting was partly going to depend on how much space I had to manoeuvre. I shouldn’t need to say this, but for any numpties out there…. no home bathrooms I know of have mains sockets in them. There’s a good reason for this! Don’t get mains electricity anywhere near this shoot. The lights I use are battery operated. If I dropped them in the water, they probably wouldn’t survive, but at least my model would!![vc_single_image image=”1923″ img_size=”full” alignment=”centre” onclick=”img_link_large” css=”.vc_custom_1459962003905{padding-top: 10px !important;}”]
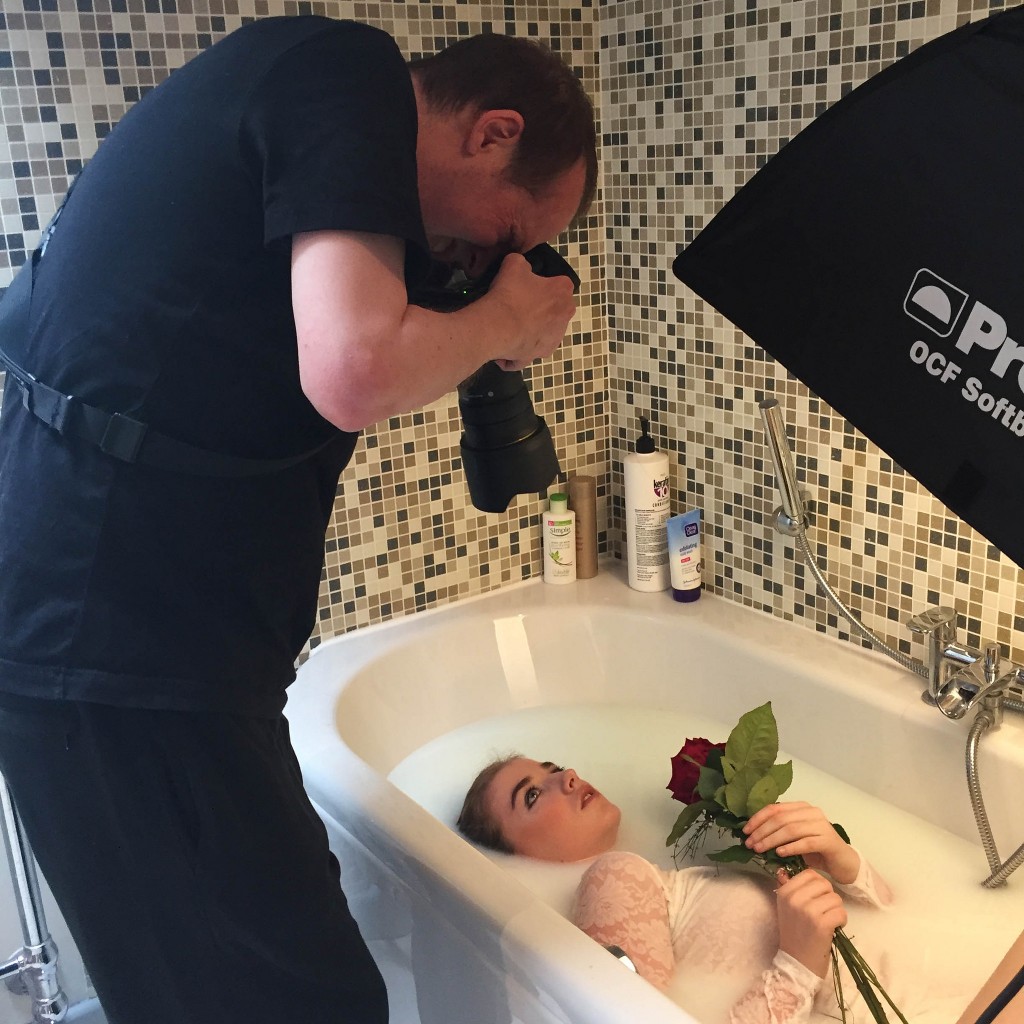
I used just one light, my Profoto B2 with a 3′ x 1′ OCF soft box, which seemed to be the right size and shape for the head to waist shots I was after. The biggest issue was getting the light into the right position over the bath tub. Luckily, I have a rather hefty c-stand with a boom arm that enabled me to manoeuvre the light directly over the centre of the tub (see pic).
The camera I used was a Nikon D810 with Nikkor 24-70 f/2.8 G lens. Most of the images I took had a focal length between 24mm and 35mm as I found that the 24-70mm lens would allow me to keep my feet firmly on the bathroom floor and just lean over the bath to get the shot I wanted. If I’d been taking any kind of normal portrait image, I would definitely have been worried about distorting the model’s features with such a wide focal length and short focal distance. However, the ‘subject’ is pretty much in the centre of the frame where distortion is less obvious and, after using the usual lens correction option in Lightroom, I didn’t really notice anything that bothered me. If you want to shoot at 50mm, you’re going to have to be taller than me (not too difficult), be content with a slightly more cropped frame of view, or get up on a pair of stepladders or orange box. F/8 was selected for maximum sharpness and to allay any focusing worries and ISO 64 is the base ‘native’ ISO value on the Nikon D810.
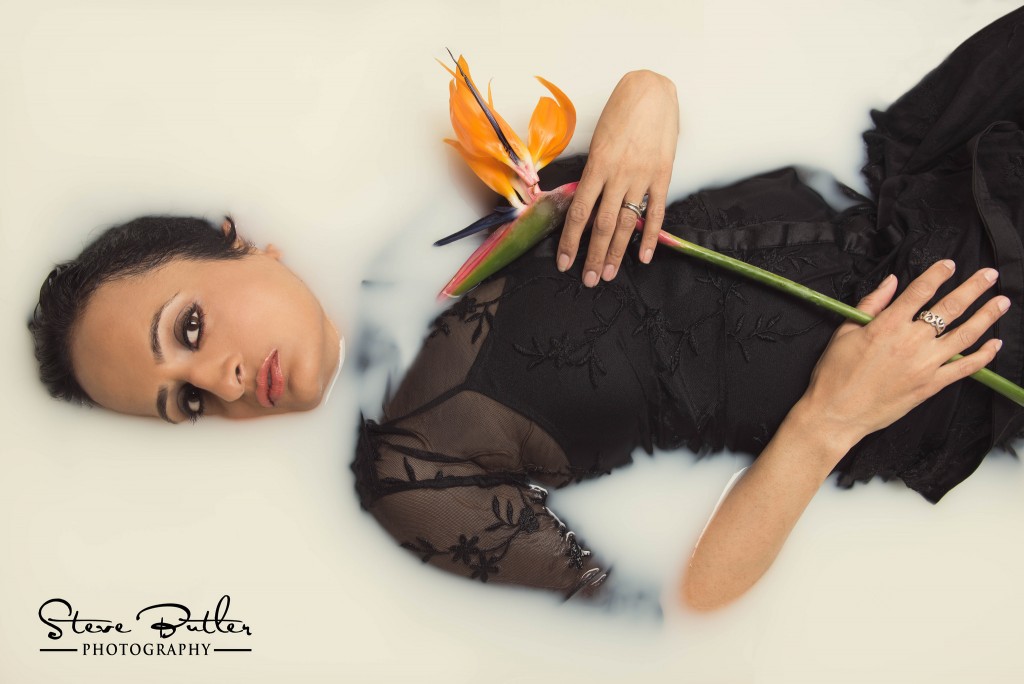
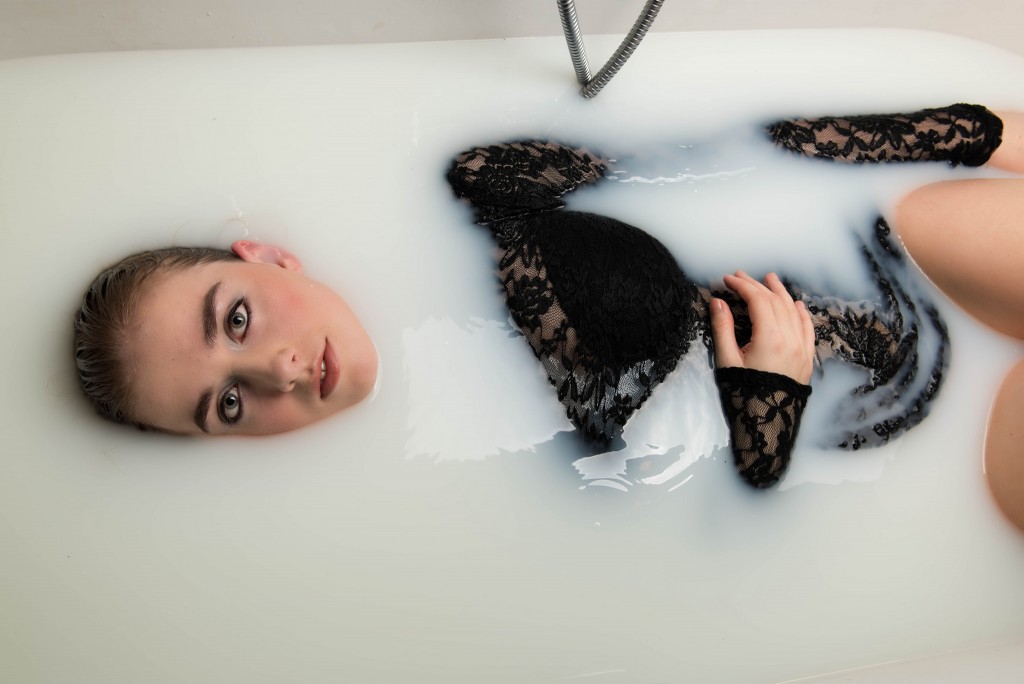
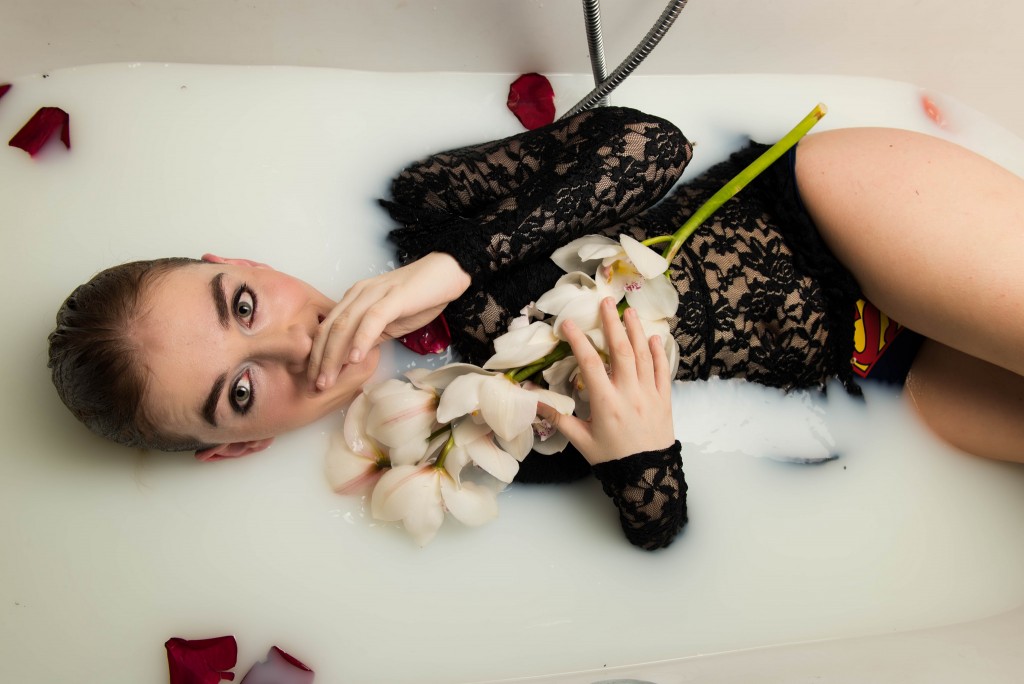
I wanted to try to get two images out of the shoot – one with Jemima wearing a white top and one with her wearing black. We did some searching around on internet shopping sites and managed to pick up a couple of long-sleeved lace top/dresses for around £10-£15 each. The other thing I knew I wanted in the shot were flowers or foliage. When I’d been putting together a mood-board for the shoot, I saw an image that featured pyracantha which I really liked. Unfortunately, it’s not the kind of thing you can readily buy from a florist (well, not in North London anyway). I saw plenty of it in people’s gardens, but save creeping around in the dead of night armed with a pair of secateurs, I decided I’d have to make do with whatever I could buy in a shop. As already hinted at, I considered this shoot complex enough to warrant a test run with Jayshri standing in (or should that be floating in). For the test run, I managed to get some red roses and an orange bird of paradise flower. For the main shoot, I got more roses as I liked the way they looked first time, and a rather expensive white orchid. In fact, the flowers were by far the most costly things to buy.
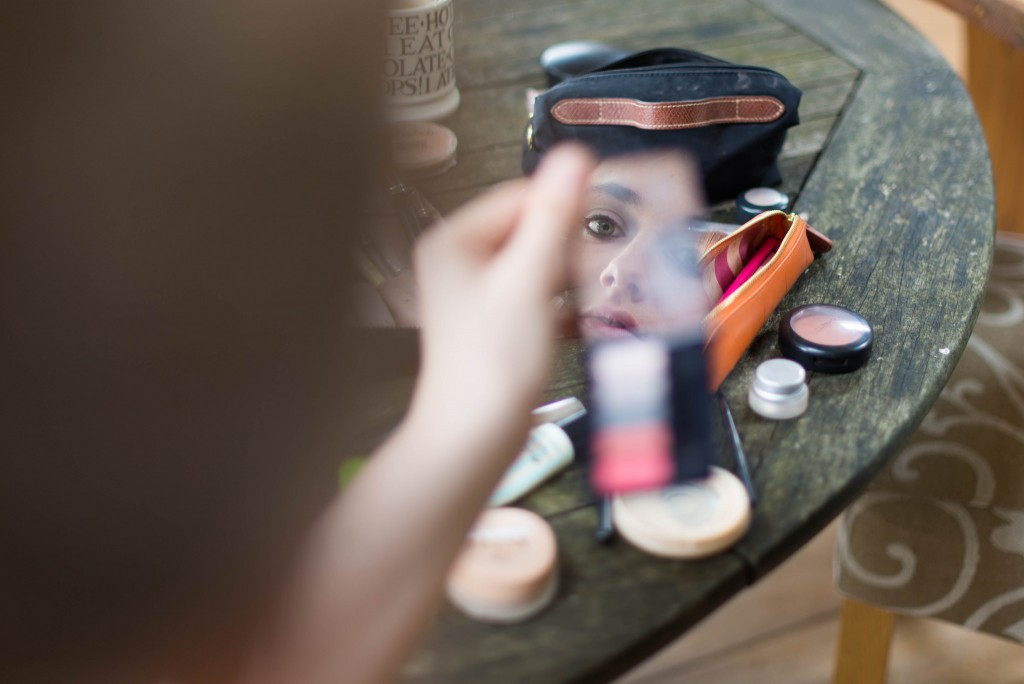
Jayshri did a great job of doing Jemima’s makeup. We tried to pick cosmetics that we thought wouldn’t run if they came in contact with the water.
Bathing in lukewarm milk gloop is probably a bit uncomfortable.
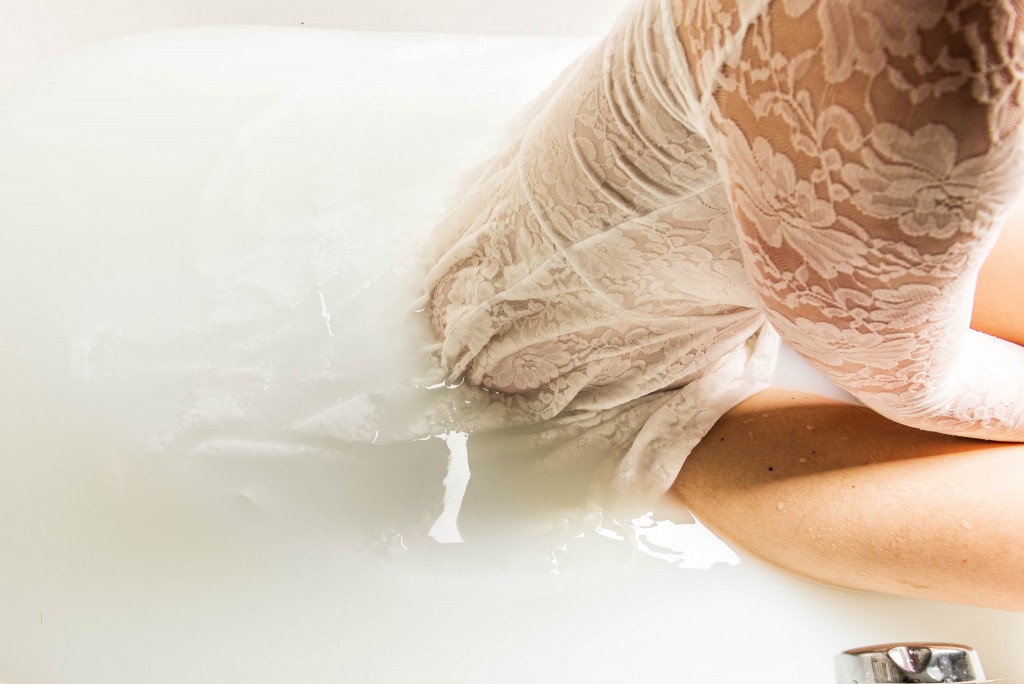
We tried the white top first with a bunch of red roses. Unfortunately, once we actually got Jemima to lie down and gave her the roses to hold, we realised that there was far too many leaves poking out in all directions and I just couldn’t get them to sit correctly when arranged across Jemima’s chest. Because bathing in lukewarm milk gloop is probably a bit uncomfortable, I didn’t feel we could ask her to just sit there while we did some judicious pruning, and the roses eventually got discarded. Consequently, the only ‘white top’ shot I quite like (see above) doesn’t feature any flowers at all.
I think we did a much better job with the black top. The white orchid against the black just looks better. However, I’m growing to like the white a bit more now. It feels a bit more ‘edgy’. By then, I had also begun to figure out the best angle to ask Jemima to turn her head to get the most natural looking images, i.e. toward the camera with right cheek partially submerged. Actually, I’m a bit cross with myself as I should have figured that out from the test shoot – if you look at my favourite two test images of Jay, that’s exactly the position she’s also in. 🙁
I love working on creative projects like this one. Taking an idea from conception, through planning and design to execution with a small team is hugely rewarding.
Thank you to Jayshri and especially Mima for putting up with all the indignities of being dunked – taking the actual pics was the easy bit! You’re both superstars!!
Model: Jemima Crawley
Makeup: Jayshri Butler
![]()